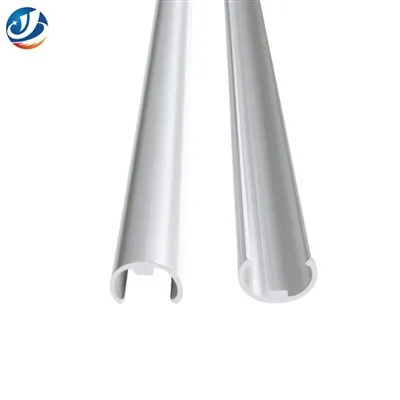
Installing aluminium tile trims on a tile edge that meets a pipe can be a challenging yet rewarding task. As a supplier of high - quality Aluminium Tile Trims, I've seen firsthand the importance of proper installation for both aesthetic and functional purposes. In this blog, I'll guide you through the step - by - step process of installing these trims in such a tricky situation.
Understanding the Basics of Aluminium Tile Trims
Aluminium tile trims are not only decorative but also serve to protect the edges of tiles. They come in various types, such as Expansion Joint Aluminium Profiles, Polished Aluminium Profile Edge Protector, and Coated Aluminum Tile Edging Trim. Each type has its own unique features and applications. Expansion joint profiles are designed to accommodate movement in the tiles due to temperature changes, while polished edge protectors add a sleek and modern look. Coated trims, on the other hand, offer enhanced durability and resistance to wear.
Tools and Materials You'll Need
Before you start the installation process, gather the necessary tools and materials. You'll need a tape measure, a hacksaw or a miter saw for cutting the aluminium trims, a level to ensure the trims are straight, adhesive suitable for aluminium and tiles, a caulking gun, silicone sealant, and safety equipment like gloves and goggles.
Step 1: Measure and Plan
The first step is to measure the length of the tile edge where the trim will be installed. Measure carefully around the pipe, taking into account the curvature and any irregularities. It's important to measure multiple times to ensure accuracy. Once you have the measurements, transfer them to the aluminium trim. Mark the cutting points on the trim using a pencil. If you're using a miter saw, set the appropriate angle for cutting. For a 90 - degree corner, set the saw to 45 degrees on each piece of trim.
Step 2: Cut the Aluminium Trim
Using your chosen cutting tool, carefully cut the aluminium trim at the marked points. Make sure the cuts are clean and straight. If you're using a hacksaw, take your time and use a steady hand. After cutting, smooth the edges of the trim with a file to remove any sharp burrs. This will not only make the installation process safer but also give a more professional finish.
Step 3: Prepare the Tile Edge
Clean the tile edge thoroughly to remove any dirt, dust, or debris. A clean surface will ensure better adhesion of the trim. You can use a damp cloth and a mild detergent to clean the tiles. Let the tiles dry completely before proceeding.
Step 4: Apply Adhesive
Apply a thin, even layer of adhesive to the back of the aluminium trim. Use a notched trowel to spread the adhesive evenly. Make sure to cover the entire area that will be in contact with the tile. Be careful not to apply too much adhesive, as it can squeeze out and create a messy finish.
Step 5: Install the Trim
Carefully place the aluminium trim on the tile edge, starting from one end. Press the trim firmly against the tile, ensuring that it is in contact with the entire edge. Use a level to check if the trim is straight. If necessary, adjust the position of the trim until it is perfectly straight. For the section that meets the pipe, you may need to bend the trim slightly to fit around the curvature. Do this gently to avoid cracking or breaking the trim.
Step 6: Secure the Trim
Once the trim is in place, use clamps or weights to hold it in position while the adhesive dries. Follow the manufacturer's instructions for the drying time of the adhesive. This can range from a few hours to a full day, depending on the type of adhesive used.
Step 7: Seal the Edges
After the adhesive has dried, use a caulking gun to apply silicone sealant along the edges of the trim. This will not only provide a waterproof seal but also give a more finished look. Smooth the sealant with a damp finger or a caulking tool for a neat appearance.


Troubleshooting
During the installation process, you may encounter some common problems. If the trim doesn't fit properly around the pipe, you can try using a heat gun to make the aluminium more flexible. Heat the trim gently and carefully bend it to fit the curve. If the adhesive doesn't seem to be holding the trim in place, check if the tile surface is clean and dry. You may also need to use a stronger adhesive.
Benefits of Using Aluminium Tile Trims
Aluminium tile trims offer several benefits. They are lightweight, making them easy to handle and install. They are also highly durable and resistant to corrosion, which means they will last for a long time. Aluminium trims are available in a wide range of colors and finishes, allowing you to choose the one that best matches your tile and overall decor.
Why Choose Our Aluminium Tile Trims
As a supplier of Aluminium Tile Trims, we take pride in offering high - quality products at competitive prices. Our trims are made from premium - grade aluminium, ensuring maximum durability and performance. We have a wide selection of trims to choose from, including the Expansion Joint Aluminium Profiles, Polished Aluminium Profile Edge Protector, and Coated Aluminum Tile Edging Trim. Our team of experts is always available to provide you with technical support and advice on installation.
Conclusion
Installing aluminium tile trims on a tile edge that meets a pipe requires careful planning and precise execution. By following the steps outlined in this blog, you can achieve a professional - looking finish. If you're interested in purchasing our Aluminium Tile Trims or have any questions about installation, we encourage you to contact us for a detailed discussion. We're here to help you transform your tile project into a stunning masterpiece.
References
- Tile Installation Handbook, various editions
- Aluminium Product Manufacturer's Guides