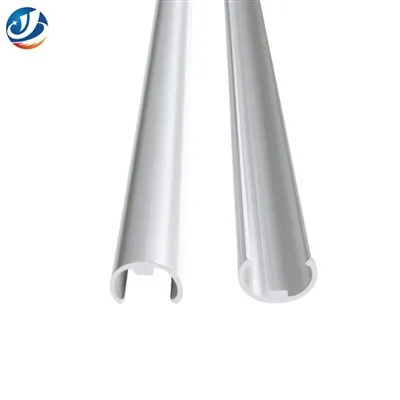
Installing aluminium tile trims on a tile edge that meets a wall is a crucial step in any tiling project. It not only enhances the aesthetic appeal of the tiled area but also provides protection to the tile edges. As a leading supplier of Aluminium Tile Trims, I have extensive experience in this field and am here to guide you through the installation process.
Understanding Aluminium Tile Trims
Aluminium tile trims come in various shapes, sizes, and finishes to suit different tiling needs. Before you start the installation, it's important to choose the right type of trim for your project.
- Anodised Aluminium Tile Trim Edging: This type of trim offers a durable and corrosion - resistant finish. It is available in a range of colors and is perfect for both indoor and outdoor applications. You can find a wide selection of Anodised Aluminium Tile Trim Edging on our website Anodised Aluminium Tile Trim Edging.
- Aluminium Trims For Flooring: These trims are specifically designed for flooring applications. They provide a smooth transition between different types of flooring materials and protect the tile edges from wear and tear. Check out our Aluminium Trims For Flooring on Aluminium Trims For Flooring.
- Aluminium Expansion Joint Tile Trim: Expansion joints are essential in areas where temperature changes can cause the tiles to expand and contract. Aluminium Expansion Joint Tile Trim helps to prevent cracking and damage to the tiles. Learn more about this type of trim on Aluminium Expansion Joint Tile Trim.
Tools and Materials Required
Before you begin the installation, gather the following tools and materials:


- Aluminium tile trims
- Measuring tape
- Tile cutter or wet saw
- Adhesive or silicone sealant
- Notched trowel
- Caulking gun
- Spirit level
- Hammer
- Nails or screws (if required)
Step - by - Step Installation Process
Step 1: Measure and Cut the Trims
- Use a measuring tape to measure the length of the tile edge where the trim will be installed. Make sure to account for any corners or curves.
- Cut the aluminium tile trims to the appropriate length using a tile cutter or wet saw. Wear safety goggles and gloves during this process to protect yourself from sharp edges.
Step 2: Prepare the Tile Edge and Wall
- Clean the tile edge and the adjacent wall surface thoroughly to remove any dirt, dust, or debris. This will ensure proper adhesion of the trim.
- If the wall surface is uneven, you may need to use a sanding block to smooth it out.
Step 3: Apply Adhesive or Sealant
- For most installations, an adhesive or silicone sealant is used to attach the trim to the tile edge and the wall. Apply a thin layer of adhesive or sealant to the back of the trim using a notched trowel or a caulking gun.
- Make sure to apply the adhesive or sealant evenly to ensure a strong bond.
Step 4: Install the Trim
- Carefully place the trimmed edge of the aluminium tile trim against the tile edge, aligning it with the wall. Press the trim firmly into place, ensuring that it is straight and level.
- Use a spirit level to check the alignment of the trim. If necessary, make adjustments by gently tapping the trim with a hammer.
- If the trim requires additional support, you can use nails or screws to secure it to the wall. However, be careful not to damage the tile or the trim during this process.
Step 5: Fill the Joints
- Once the trim is installed, use a caulking gun to fill the joints between the trim and the tile, as well as between the trim and the wall, with a suitable caulking material.
- Smooth the caulking material using a putty knife or a caulking tool to give it a neat and professional finish.
Step 6: Clean Up
- Wipe away any excess adhesive, sealant, or caulking material from the tile and the trim using a damp cloth.
- Allow the adhesive and caulking material to dry completely before using the tiled area.
Tips for a Successful Installation
- Plan Ahead: Before you start the installation, carefully plan the layout of the trims. This will help you avoid any mistakes and ensure a professional - looking finish.
- Take Your Time: Installing aluminium tile trims requires patience and precision. Don't rush the process, and make sure each step is done correctly.
- Use Quality Materials: Invest in high - quality aluminium tile trims and adhesives to ensure a long - lasting and durable installation.
- Seek Professional Help if Needed: If you are unsure about any aspect of the installation process, don't hesitate to seek the help of a professional tiler.
Contact Us for Your Aluminium Tile Trim Needs
As a trusted supplier of Aluminium Tile Trims, we offer a wide range of products to meet your specific requirements. Whether you are a professional tiler or a DIY enthusiast, we have the right trim for your project.
If you are interested in purchasing our aluminium tile trims or have any questions about the installation process, please feel free to contact us. We are here to provide you with the best products and service. Let's start a conversation about your tiling project and find the perfect aluminium tile trims for you.
References
- "Tile Installation Handbook" - A comprehensive guide on tile installation techniques and materials.
- "Aluminium Extrusion Technology" - This book provides in - depth knowledge about aluminium extrusion processes and the properties of aluminium products.