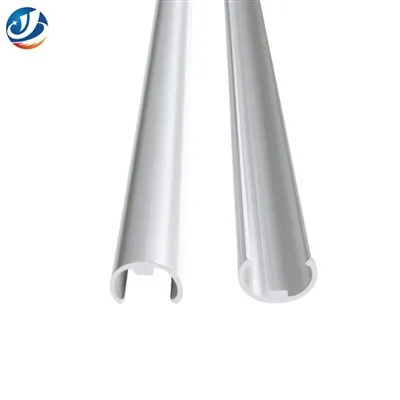
Installing aluminium floor trim in a living room is not only a practical solution for protecting your flooring edges but also an aesthetic enhancement that can elevate the overall look of your space. As a leading supplier of high - quality Aluminium Floor Trim, I'm here to guide you through the entire installation process step - by - step.
Understanding the Different Types of Aluminium Floor Trim
Before you start the installation, it's important to understand the different types of aluminium floor trim available. Each type serves a unique purpose and can be selected based on your specific needs.


- Aluminium Floor Cover Strip: This type is designed to cover the edges of your flooring, providing a smooth and finished look. It can also protect the edges from damage. You can find a wide range of options at Aluminium Floor Cover Strip.
- Aluminium Laminate Floor Edging: Ideal for laminate floors, this trim provides a clean and professional finish. It helps to prevent the laminate from chipping or peeling at the edges. Check out Aluminium Laminate Floor Edging for various styles and sizes.
- Aluminium Floor Transition Strip: When you have two different types of flooring meeting in your living room, such as carpet and hardwood, a transition strip is essential. It creates a seamless transition between the two surfaces. Explore our Aluminium Floor Transition Strip collection.
- Aluminum Flat Bar Profile Flooring: This type of trim offers a simple and sleek look. It can be used to define the edges of your flooring or to create a decorative element. Visit Aluminum Flat Bar Profile Flooring for more details.
- Aluminium Transition Strips For Laminate Flooring: Specifically designed for laminate floors when transitioning to other surfaces, these strips ensure a smooth and stable connection. See our selection at Aluminium Transition Strips For Laminate Flooring.
Tools and Materials You'll Need
- Tools:
- Measuring tape: To measure the length of the areas where you'll install the trim.
- Utility knife: For cutting the trim to the correct length.
- Hammer or nail gun: If you're using nails to secure the trim.
- Screwdriver: For screw - in type trims.
- Level: To ensure the trim is installed straight.
- Pencil: For marking the cutting points on the trim.
- Materials:
- Aluminium floor trim of your choice.
- Nails or screws, depending on the installation method.
- Adhesive (optional, for some types of installation).
Preparation Steps
- Measure the Area: Use a measuring tape to accurately measure the length of the edges where you'll install the aluminium floor trim. It's important to measure multiple times to ensure accuracy. Take into account any corners or angled areas, and make note of these measurements.
- Clean the Surface: Thoroughly clean the floor edges where the trim will be installed. Remove any dirt, dust, or debris. This will ensure a proper adhesion or attachment of the trim to the floor.
- Cut the Trim: Based on your measurements, use a utility knife to cut the aluminium floor trim to the correct length. If you have angled cuts, use a miter box to ensure precise angles. Make sure to wear safety goggles during this process.
Installation Process
For Straight Edges
- Mark the Position: Use a pencil to mark the position of the trim on the floor edge. Make sure the marks are straight and level. You can use a level to double - check.
- Attach the Trim:
- Nail - in Method: If you're using nails, start at one end of the marked area. Place the trim in position and use a hammer or nail gun to drive nails through the pre - drilled holes in the trim and into the floor. Space the nails evenly along the length of the trim, usually about every 6 - 8 inches.
- Screw - in Method: For screw - in type trims, pre - drill holes in the floor at the marked positions. Then, place the trim in position and use a screwdriver to drive the screws through the holes in the trim and into the pre - drilled holes in the floor.
- Adhesive Method: Apply a thin layer of adhesive along the back of the trim. Press the trim firmly onto the floor edge, making sure it is in the correct position. Use a roller or a block of wood to apply even pressure along the length of the trim.
For Corners
- Miter the Trim: For inside corners, cut the ends of the two pieces of trim at a 45 - degree angle in opposite directions. For outside corners, also cut the ends at a 45 - degree angle, but in the same direction.
- Join the Trim: Once the pieces are cut, fit them together at the corner. Make sure the mitered edges align perfectly. Secure the corner joint using nails, screws, or adhesive, depending on the type of trim and your chosen installation method.
For Transitions
- Position the Transition Strip: Place the aluminium floor transition strip at the junction of the two different flooring surfaces. Make sure it is centered and level.
- Secure the Strip: Use nails, screws, or adhesive to secure the transition strip in place. If using nails or screws, make sure they are long enough to penetrate both the strip and the underlying floor structure.
Finishing Touches
After the trim is installed, check for any gaps or uneven areas. If there are small gaps, you can use a silicone sealant to fill them. Wipe away any excess sealant with a damp cloth. Also, check that all the nails or screws are flush with the surface of the trim. If not, use a hammer or screwdriver to adjust them.
Maintenance Tips
- Regularly clean the aluminium floor trim with a mild detergent and a soft cloth. This will keep it looking shiny and new.
- Avoid using abrasive cleaners or scrubbers, as they can scratch the surface of the trim.
- If the trim gets scratched, you can use a fine - grit sandpaper to gently buff out the scratch, followed by a metal polish to restore its shine.
Why Choose Our Aluminium Floor Trim
- High - Quality Material: Our aluminium floor trim is made from premium - grade aluminium, which is durable and resistant to corrosion.
- Variety of Styles: We offer a wide range of styles and finishes to suit different interior design themes. Whether you prefer a modern, minimalist look or a more traditional style, we have the perfect trim for you.
- Easy Installation: Our products are designed for easy installation, even for DIY enthusiasts. We provide detailed installation guides and support to ensure a smooth installation process.
Contact Us for Procurement
If you're interested in purchasing our high - quality aluminium floor trim for your living room or any other project, we're here to help. We offer competitive prices, excellent customer service, and fast shipping. Feel free to reach out to us to discuss your specific requirements and place an order.
References
- Wood, D. (2018). DIY Flooring Installation: A Comprehensive Guide. Home Improvement Press.
- Smith, J. (2020). Aluminium Products for Interior Design. Interior Design Journal.