

Hey there! As a supplier of Aluminium Trim Profiles, I often get asked about how to join these profiles together. It's a crucial step in many construction and renovation projects, and getting it right can make a huge difference in the final look and durability of your work. In this blog, I'll share some tips and techniques on how to join Aluminium Trim Profiles effectively.

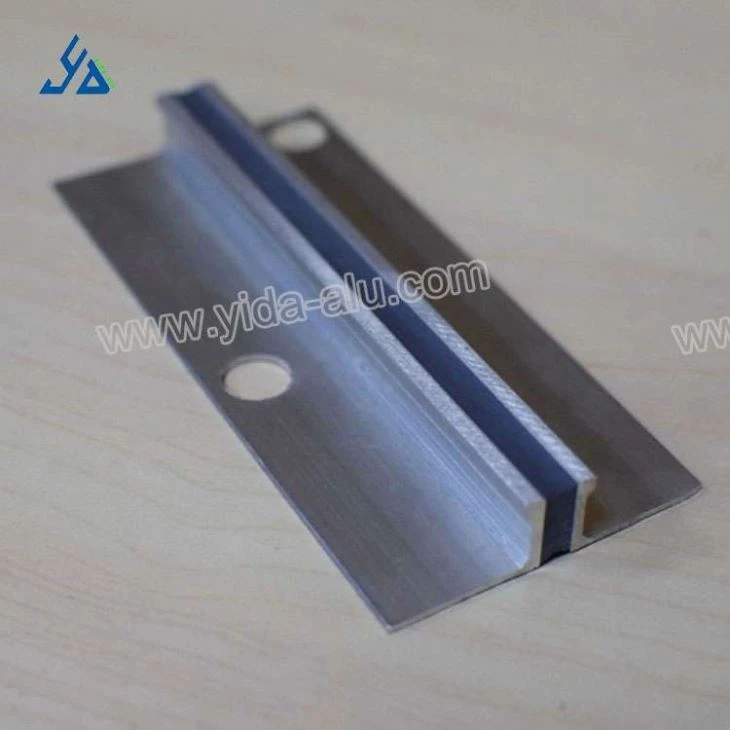
Why Joining Aluminium Trim Profiles Matters
First off, let's talk about why joining these profiles is so important. Aluminium Trim Profiles are used for a variety of purposes, such as protecting edges, providing a finished look, and hiding unsightly gaps. When you're working on a project, you'll often need to connect multiple pieces of trim to cover larger areas or to create custom shapes. If the joints aren't done properly, you'll end up with a messy, uneven finish that can detract from the overall appearance of your project. Plus, poorly joined profiles may not provide the same level of protection or durability as well - connected ones.
Tools You'll Need
Before you start joining Aluminium Trim Profiles, you'll need to gather a few essential tools:
- Measuring Tape: To ensure accurate cuts and proper alignment.
- Hacksaw or Miter Saw: For cutting the profiles to the right length and angle. A miter saw is great for making precise angled cuts, which are often necessary for corners.
- File or Sandpaper: To smooth out any rough edges after cutting.
- Adhesive or Fasteners: Depending on the type of joint and the application, you'll need either a strong adhesive or appropriate fasteners like screws or nails.
- Clamps: To hold the profiles in place while the adhesive dries or while you're screwing them together.
Types of Joints
There are several types of joints you can use to join Aluminium Trim Profiles, and the choice depends on the specific requirements of your project.
Butt Joint
The butt joint is the simplest type of joint. It involves simply butting two pieces of trim together end - to - end. This joint is easy to make but may not be the strongest or most aesthetically pleasing option. To make a butt joint:
- Measure and cut the profiles to the correct length.
- Apply a small amount of adhesive to the ends of the profiles.
- Align the two pieces carefully and use clamps to hold them together until the adhesive dries. If you're using fasteners, drill pilot holes first to prevent the aluminium from cracking, then insert the screws or nails.
Miter Joint
A miter joint is ideal for creating corners. It involves cutting the ends of the profiles at an angle (usually 45 degrees for a 90 - degree corner). This type of joint provides a more seamless and professional look. Here's how to make a miter joint:
- Measure and mark the profiles where you need to make the cuts.
- Use a miter saw to cut the ends of the profiles at the desired angle. Make sure the cuts are clean and accurate.
- Apply adhesive to the mitered ends and carefully align the two pieces. The angle of the cuts should fit together perfectly.
- Clamp the profiles in place until the adhesive sets. You can also use small nails or screws to reinforce the joint, but be careful not to damage the appearance of the trim.
Lap Joint
A lap joint is stronger than a butt joint and provides more surface area for adhesion or fastening. In a lap joint, one piece of trim overlaps the other. To make a lap joint:
- Measure and mark the overlap area on the profiles.
- Cut the profiles accordingly.
- Apply adhesive to the overlapping surfaces and press the two pieces together. Use clamps to hold them firmly in place. You can also use screws or rivets to secure the joint further.
Using Adhesive
Adhesive is a popular choice for joining Aluminium Trim Profiles because it provides a clean and seamless look. When using adhesive:
- Choose an adhesive that is specifically designed for aluminium. Look for one that offers good bonding strength and is resistant to moisture and temperature changes.
- Clean the surfaces of the profiles thoroughly before applying the adhesive. Any dirt, grease, or debris can prevent the adhesive from bonding properly.
- Apply the adhesive evenly to the joint area. Follow the manufacturer's instructions regarding the amount of adhesive to use and the drying time.
- Once the adhesive is applied, press the profiles together firmly and use clamps to hold them in place until the adhesive has fully cured.
Using Fasteners
Fasteners like screws or nails can also be used to join Aluminium Trim Profiles. They provide a more mechanical connection and can be a good option for heavy - duty applications.
- When using screws, drill pilot holes first to prevent the aluminium from splitting. The size of the pilot hole should be slightly smaller than the diameter of the screw.
- Make sure the screws or nails are made of a material that won't corrode when in contact with aluminium. Stainless steel is a good choice.
- Space the fasteners evenly along the joint to ensure a secure connection.
Special Considerations for Different Applications
If you're using Aluminium Trim Profiles for specific applications, there are some additional things to keep in mind.
For Tile Edging
When using Aluminium Trim Profiles for tile edging, you can check out our Ceramic Tile Expansion Joint Cover. These profiles need to be joined in a way that provides a smooth transition between tiles and protects the edges. Make sure the joints are flush and well - sealed to prevent water from seeping behind the tiles.
For Decorative Purposes
If you're using Aluminium Trim Profiles for decorative purposes, the appearance of the joint is crucial. Consider using Color Coated Aluminum Edge Trim. For a more seamless look, use miter joints and take extra care to sand and finish the joints so they blend in with the rest of the trim.
For Ramps
In the case of Aluminum Ramp Tile Edging Trims, the joints need to be strong enough to withstand the weight and traffic. Use lap joints or a combination of adhesive and fasteners to ensure a durable connection.
Tips for a Successful Join
- Test Fit: Before applying adhesive or using fasteners, do a test fit of the profiles to make sure they fit together properly. This will give you a chance to make any necessary adjustments.
- Cleanliness is Key: Keep the profiles clean throughout the process. Any dirt or debris can affect the quality of the joint.
- Follow Instructions: Whether you're using adhesive or fasteners, always follow the manufacturer's instructions for best results.
Conclusion
Joining Aluminium Trim Profiles is a skill that can greatly enhance the quality and appearance of your construction or renovation projects. By choosing the right type of joint, using the proper tools, and following the tips outlined above, you can create strong, durable, and aesthetically pleasing joints.
If you're interested in purchasing Aluminium Trim Profiles for your next project, or if you have any questions about joining them, don't hesitate to reach out. We're here to help you find the best solutions for your needs. Contact us to start a procurement discussion and let's make your project a success!
References
- "Aluminium Extrusion Handbook" - A comprehensive guide on aluminium products and their applications.
- Industry - specific construction magazines and online forums that discuss best practices for working with aluminium profiles.


