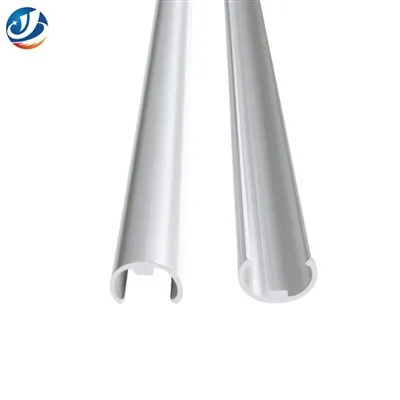
Hey there! As a supplier of Aluminium Tile Trims, I often get asked about the installation process for aluminium corner tile trims. In this blog post, I'm gonna walk you through the whole thing, step by step.
First off, let's talk about why you'd want to use aluminium corner tile trims in the first place. Aluminium is a great material for tile trims. It's lightweight, yet strong and durable. It can withstand a lot of wear and tear, making it perfect for high - traffic areas. Plus, it has a sleek and modern look that can really enhance the appearance of your tiled surfaces.
Pre - installation Preparation
Before you start installing the aluminium corner tile trims, you need to do some prep work.
Measuring
The very first step is to measure the area where you'll be installing the trims. You gotta be as accurate as possible here. Use a good quality measuring tape to measure the length of each corner where the trim will go. Make sure to measure both the vertical and horizontal sides of the corner. Write down these measurements so you don't forget them.
Cutting the Trims
Once you have your measurements, it's time to cut the aluminium corner tile trims to the right size. You'll need a proper cutting tool for this. A hacksaw or a power saw with a fine - tooth blade works well. When cutting the trims, wear safety goggles to protect your eyes from any flying debris. Cut the trims at a 45 - degree angle at the corners so that they fit together neatly. This is called a miter cut. It might take a bit of practice to get the cuts just right, but with a little patience, you'll get the hang of it.
Cleaning the Surface
The surface where you're going to install the trims needs to be clean and dry. Use a mild detergent and a clean cloth to wipe down the area. Remove any dirt, dust, or grease. This will ensure that the adhesive used to attach the trims will stick properly.
Installation Process
Now that you've done all the prep work, it's time to start installing the trims.
Applying Adhesive
There are different types of adhesives you can use for aluminium corner tile trims. You can choose from a tile adhesive or a construction adhesive. Read the instructions on the adhesive carefully before using it. Squeeze a small amount of adhesive onto the back of the trim. Make sure to spread it evenly. You don't want too much adhesive, as it can squeeze out and make a mess when you press the trim against the wall or floor.
Positioning the Trim
Carefully place the cut and adhesive - coated trim into position at the corner. Press it firmly against the surface. Use a level to make sure the trim is straight. If it's not, adjust it until it is. Hold the trim in place for a few minutes to let the adhesive start to set.
Joining the Trims
When you need to join two trims together, make sure the miter cuts fit perfectly. Apply a small amount of adhesive to the joint area and press the two trims together. You can use a clamp to hold them in place while the adhesive dries. This will ensure a strong and seamless joint.
Finishing Touches
After all the trims are installed, check for any gaps or uneven areas. If you find any, you can use a small amount of caulk to fill them in. Smooth out the caulk with a caulk smoothing tool or your finger. This will give your installation a professional look.
Different Types of Aluminium Tile Trims
We offer a wide range of aluminium tile trims at our supply. For example, the Powder Coated Brown L Shape Tile Trim is a great option if you're looking for a trim with a stylish and durable finish. The powder coating not only gives it a nice color but also protects it from scratches and corrosion.
Another popular product is the Aluminum Floor Expansion Joint Cover. This is essential for areas where the floor might expand or contract due to temperature changes. It helps to prevent damage to the tiles and gives the floor a clean and finished look.
And then there's the Anodised Aluminium Tile Trim Joint. Anodized aluminium is highly resistant to wear and has a beautiful, natural - looking finish. It's perfect for creating seamless joints between tiles.
Troubleshooting
Sometimes, things might not go as smoothly as planned during the installation process. Here are some common issues and how to fix them.


Adhesive Not Sticking
If the adhesive isn't sticking properly, it could be because the surface wasn't clean enough or the adhesive has expired. Try cleaning the surface again and using a fresh batch of adhesive.
Gaps in the Joints
If you notice gaps in the joints between the trims, you can try re - cutting the trims at a more precise 45 - degree angle. You can also use a small amount of filler to fill in the gaps.
Trim Not Lining Up
If the trim isn't lining up straight, use a level to adjust it. You might need to remove the trim and re - apply the adhesive if it's already started to set.
Conclusion
Installing aluminium corner tile trims isn't too difficult if you follow the right steps. It can really transform the look of your tiled areas and add a touch of professionalism. Whether you're a DIY enthusiast or a professional contractor, our range of aluminium tile trims has something for everyone.
If you're interested in purchasing our aluminium tile trims or have any questions about the installation process, feel free to reach out. We're here to help you with all your tile trim needs.
References
- Tile Installation Handbook: A guide on different tile installation techniques.
- Aluminium Product Manual: Information about the properties and uses of aluminium products.