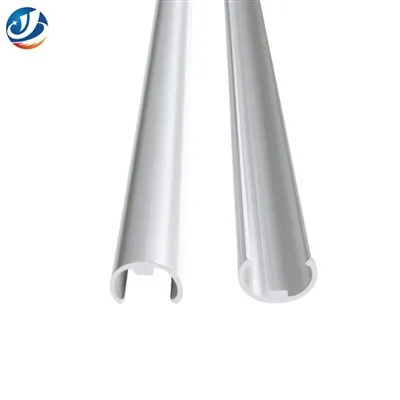
As a seasoned supplier of Extruded Aluminum Channels, I've witnessed firsthand the diverse needs and challenges that come with installing these versatile products. Extruded aluminum channels are widely used in various industries, from construction and manufacturing to automotive and electronics, due to their lightweight, corrosion-resistant, and customizable nature. However, to ensure a successful installation, having the right tools is crucial. In this blog post, I'll share the essential installation tools needed for extruded aluminum channels, along with some tips and insights based on my years of experience in the industry.
Measuring Tools
Accurate measurements are the foundation of any successful installation. Before you start cutting or fitting the extruded aluminum channels, you need to measure the area where they will be installed. Here are some essential measuring tools:
- Tape Measure: A tape measure is a must-have tool for measuring lengths, widths, and heights. Make sure to choose a tape measure that is long enough for your project and has clear markings.
- Caliper: A caliper is used to measure the thickness, diameter, and other precise dimensions of the extruded aluminum channels. It's especially useful when you need to ensure a precise fit.
- Square: A square is used to check if the corners and edges of the installation area are 90 degrees. This is important for ensuring that the extruded aluminum channels are installed straight and level.
Cutting Tools
Once you have the measurements, you'll need to cut the extruded aluminum channels to the appropriate length. Here are some common cutting tools:
- Hacksaw: A hacksaw is a simple and affordable tool for cutting extruded aluminum channels. It's suitable for small projects and occasional use. However, it can be time-consuming and may not provide a very precise cut.
- Miter Saw: A miter saw is a more advanced cutting tool that can make precise cuts at various angles. It's ideal for larger projects and professional installers. Make sure to use a blade that is specifically designed for cutting aluminum.
- Circular Saw: A circular saw is another option for cutting extruded aluminum channels. It's faster than a hacksaw and can make straight cuts. However, it may not be as precise as a miter saw.
Fastening Tools
After cutting the extruded aluminum channels, you'll need to fasten them to the installation surface. Here are some common fastening tools:
- Screwdriver: A screwdriver is used to install screws and bolts. Make sure to choose the right size and type of screwdriver for the screws you're using.
- Drill: A drill is used to create holes in the extruded aluminum channels and the installation surface for screws and bolts. Make sure to use a drill bit that is specifically designed for drilling aluminum.
- Wrench: A wrench is used to tighten nuts and bolts. Make sure to choose the right size and type of wrench for the nuts and bolts you're using.
Assembly Tools
In addition to the measuring, cutting, and fastening tools, you may also need some assembly tools to put the extruded aluminum channels together. Here are some common assembly tools:
- Clamps: Clamps are used to hold the extruded aluminum channels in place while you're assembling them. They're especially useful when you need to align the channels and ensure a tight fit.
- Glue Gun: A glue gun is used to apply adhesive to the extruded aluminum channels. It's useful for bonding the channels together or attaching them to other surfaces.
- Allen Wrench: An Allen wrench is used to tighten or loosen bolts and screws that have hexagonal heads. It's commonly used in the assembly of extruded aluminum channel systems.
Safety Tools
Finally, it's important to prioritize safety when installing extruded aluminum channels. Here are some essential safety tools:


- Safety Glasses: Safety glasses protect your eyes from flying debris and particles during cutting, drilling, and other installation processes.
- Gloves: Gloves protect your hands from sharp edges, hot surfaces, and chemicals.
- Dust Mask: A dust mask protects your lungs from inhaling dust and fumes generated during cutting and drilling.
Tips for a Successful Installation
- Read the Instructions: Before you start installing the extruded aluminum channels, make sure to read the manufacturer's instructions carefully. This will help you understand the installation process and any specific requirements.
- Prepare the Installation Surface: The installation surface should be clean, dry, and level. Remove any dirt, debris, or paint from the surface before installing the channels.
- Use the Right Tools: Using the right tools for the job is crucial for a successful installation. Make sure to choose tools that are appropriate for the size and type of extruded aluminum channels you're installing.
- Take Your Time: Installing extruded aluminum channels requires patience and precision. Don't rush the process and take the time to ensure that each step is done correctly.
- Test the Fit: Before you fasten the extruded aluminum channels in place, test the fit to make sure they're aligned and level. Make any necessary adjustments before proceeding.
Conclusion
Installing extruded aluminum channels requires the right tools, skills, and knowledge. By using the essential installation tools mentioned in this blog post and following the tips and guidelines, you can ensure a successful installation. As a supplier of Extruded Aluminum Channel Profiles, Anodized Extruded Aluminum Channel, and Metric Extruded Aluminum Channel, I'm here to help you with any questions or concerns you may have. If you're interested in purchasing our products or need more information, please don't hesitate to contact us for a procurement discussion.
References
- Aluminum Extruders Council. (n.d.). Aluminum Extrusion Handbook. Retrieved from [Website URL]
- OSHA. (n.d.). Safety and Health Topics - Aluminum Extrusion. Retrieved from [Website URL]