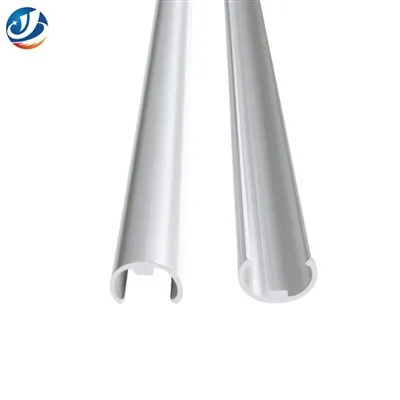
If you’ve ever worked with custom fabrication, automation builds, or display systems, you know that CNC aluminium profiles are the unsung heroes of modular, precision-built projects. As a CNC aluminium profile supplier, I’ve spent over a decade walking customers through install mistakes that turn smooth builds into headache-inducing messes—misaligned mounting holes, uneven frame squareness, or even stripped extrusion slots that leave structures wobbly. This guide cuts through the industry jargon to break down how to install CNC aluminium profiles safely, accurately, and efficiently, with tips I’ve picked up from troubleshooting everything from small DIY CNC router builds to large industrial display frameworks.
Before we jump into step-by-step installation, let’s start with non-negotiable prep work. Skipping this part is like building a house on a lumpy foundation: it’s only a matter of time before problems emerge. First, confirm your profile is the right type for your project. We stock a range, including custom CNC display frame aluminium profiles, DIY CNC router aluminium profiles, and cnc router aluminium profiles for industrial machine builds, so double-check that you ordered the correct cross-section, slot size, and length. For example, a t-slot profile meant for a display frame won’t have the load-bearing wall thickness needed for a CNC router gantry—mismatched specs lead to unnecessary adjustment later.
Next, gather your tools and parts. You won’t need a fancy workshop, but a basic set ensures precision: a tape measure (accurate to 1/16 of an inch minimum, no flimsy dollar-store ones), a combination square (critical for checking 90-degree angles), a drill with drill bits matched to your screws, a hex wrench set (most profiles use M5 or M6 hex bolts), a file for smoothing rough cut ends, and a mallet for gently tapping parts into place. If your project includes add-ons like mounting plates for motors or sensors, grab those too—pro tip: lay out all profile pieces and fasteners on a flat workbench before starting, so you’re not searching for a lost bolt mid-install. Also, confirm your workspace is level; even a 1/8-inch tilt on a workbench will throw off your frame’s alignment, so use a spirit level to calibrate the surface first.
Now, the core of the installation: building your frame. This applies to any profile type, whether you’re working on a diy cnc router aluminium profile build or a cnc display frame aluminium profile for a trade show booth. Start by cutting your profiles to the correct length—always use a miter saw with a carbide-tipped blade (or a bandsaw for clean cuts) to prevent burrs, which can snag on fasteners and throw off dimensions. After cutting, file the ends smooth to remove any metal shavings; leftover burrs can block t-slot fasteners, leading to stripped slots or loose connections.
When assembling the frame, focus on squareness first, not tightness. Here’s how: take two side profiles and two end profiles, align them at the corners, and hand-tighten one bolt at each corner only until the profile pieces are held in place—not so tight that they can’t shift. Then, use your combination square to check the internal angle at each corner. For a perfect 90-degree frame, the square should fit flush against both sides of the corner without gaps. If there’s a gap, loosen the bolts slightly, tap the profile into place with your mallet, and recheck the angle. Repeat this for all four corners until every internal angle is within 0.02 degrees (most combination squares can measure this with a little care). Once all four corners are square, go back and tighten all bolts to the manufacturer’s recommended torque—over-tightening can crack thin-walled profiles, while under-tightening will cause wobble during use.
For longer, larger frames (like those for industrial cnc router aluminium profiles or automated production lines), add cross-supports every 3 to 4 feet to reduce flex. I’ve seen too many customers skip these, and by the time they run a test load on their display frame or CNC router, the middle of the frame sags by a millimeter—enough to ruin precision. Cross-supports are easy: use smaller profile pieces, mount them between the main horizontal profiles with t-slot nuts, and tighten them just enough to hold, not compress. Flex is the enemy of precision, so don’t cut corners here.
Once your frame is assembled, it’s time to install add-on components, which is where many new builders get tripped up. Whether you’re mounting a spindle motor to a diy cnc router aluminium profile gantry or a display screen to a cnc display frame aluminium profile, alignment is key. For most components, you’ll use aluminum cnc machining parts or cnc machined aluminium parts that are custom-cut to fit the profile’s slots. When mounting, slide t-slot nuts into the profile’s slots first before tightening screws—this prevents fasteners from slipping mid-install and ensures a secure hold. For example, if you’re adding a linear rail to a CNC router, align the rail’s mounting holes with the profile’s slots, slide the t-slot nuts into the correct positions, and hand-tighten each bolt to hold the rail in alignment before making final torque adjustments.
A common mistake here is not checking component alignment perpendicular to the frame. I once worked with a customer who built a display frame, mounted a 55-inch screen, and found the screen was tilted 2 degrees because he didn’t check the rail’s angle against the frame’s vertical profile. Before final tightening, use your combination square to verify that all add-ons are parallel or perpendicular to the frame’s edges, depending on your project’s requirements. If you’re working with electrical components (like wiring for a CNC router), route cables through the profile’s internal channels (if your profile has them) to avoid snags and keep the build clean—this also prevents cables from getting damaged by moving parts over time.
Finally, test the stability of your finished installation. For small projects like display frames, give the frame a gentle shake; it should feel rigid with no side-to-side play. For larger builds like CNC routers, run a test move of the gantry and check for any wobble or deviation. If you notice movement, go back to your corner bolts and cross-supports—tighten them slightly, and recheck squareness. It’s far easier to adjust minor issues now than after you’ve spent hours programming a CNC machine or assembling display graphics.
If you’re new to working with CNC aluminium profiles, don’t hesitate to reach out with your specific project needs. Whether you’re sourcing profiles for a diy cnc router build, a custom display frame, or industrial cnc machining parts, we’re here to help ensure your installation goes smoothly. To start your next project, connect with our team to discuss your requirements, request a sample, or get personalized guidance tailored to your build.
References


- Aluminum Extrusion Design Manual. Extrusion Council, 2022.
- "Installation Best Practices for T-Slot Aluminum Profiles." Modern Machine Shop, vol. 35, no. 4, 2023, pp. 45-48.
- DIY CNC Build Guide: Precision Frame Assembly. Make: Magazine, 2021.
- "Load-Bearing Considerations for Aluminium Extrusion Structures." Journal of Manufacturing Processes, vol. 56, 2022, pp. 1127-1135.